Storybook
What is Storybook
Storybook is a user interface development environment and playground for UI components. The tool enables developers to create components independently and showcase components interactively in an isolated development environment. The current components for MilMove are deployed to https://storybook.dp3.us after each build of the main branch.
Basics
Storybook expects stories to be defined for each component to be showcased. These stories are defined in the stories directory src/stories
Option A: Running with tooling installed locally
This is the flow that most engineers will likely take since they probably have all the dependencies installed already.
Dependencies
If this is your first time running storybook you should run make client_deps first to ensure storybook packages are installed
How to run storybook server locally
To see the components locally simply run make storybook and the server will start and automatically open a browser window. If not open http://localhost:6006
How to generate static storybook site files
If you wish to generate the static version of storybook run make build_storybook and the command will generate the files in storybook-static
Option B: Running in a docker container
If you don't have all the typical development tools installed this will walk you through running storybook without that. It does require docker to be installed you can get Docker CE for Mac from here. Detailed instructions for installation can be found in the Docker for Mac Documentation
Once Docker CE for Mac is installed run the make storybook_docker command to start the storybook server. This will not automatically start your browser so once you see the below you can open http://localhost:6006/ and view storybook.
>$ make storybook_docker
storybook_1  | webpack built e8e291d7822d6638fa63 in 18740ms
storybook_1  | ╭─────────────────────────────────────────────────╮
storybook_1  | │                                                 │
storybook_1  | │   Storybook 5.3.14 started                      │
storybook_1  | │   15 s for manager and 20 s for preview         │
storybook_1  | │                                                 │
storybook_1  | │    Local:            http://localhost:6006/     │
storybook_1  | │    On your network:  http://172.18.0.2:6006/    │
storybook_1  | │                                                 │
storybook_1  | ╰─────────────────────────────────────────────────╯
Option C: Viewing a Pull Request artifact
If you don't want to set up any development tools on your local machine, another option is to use the static copy of storybook which is automatically generated as part of every pull request created by developers, although finding this does require a little bit of work.
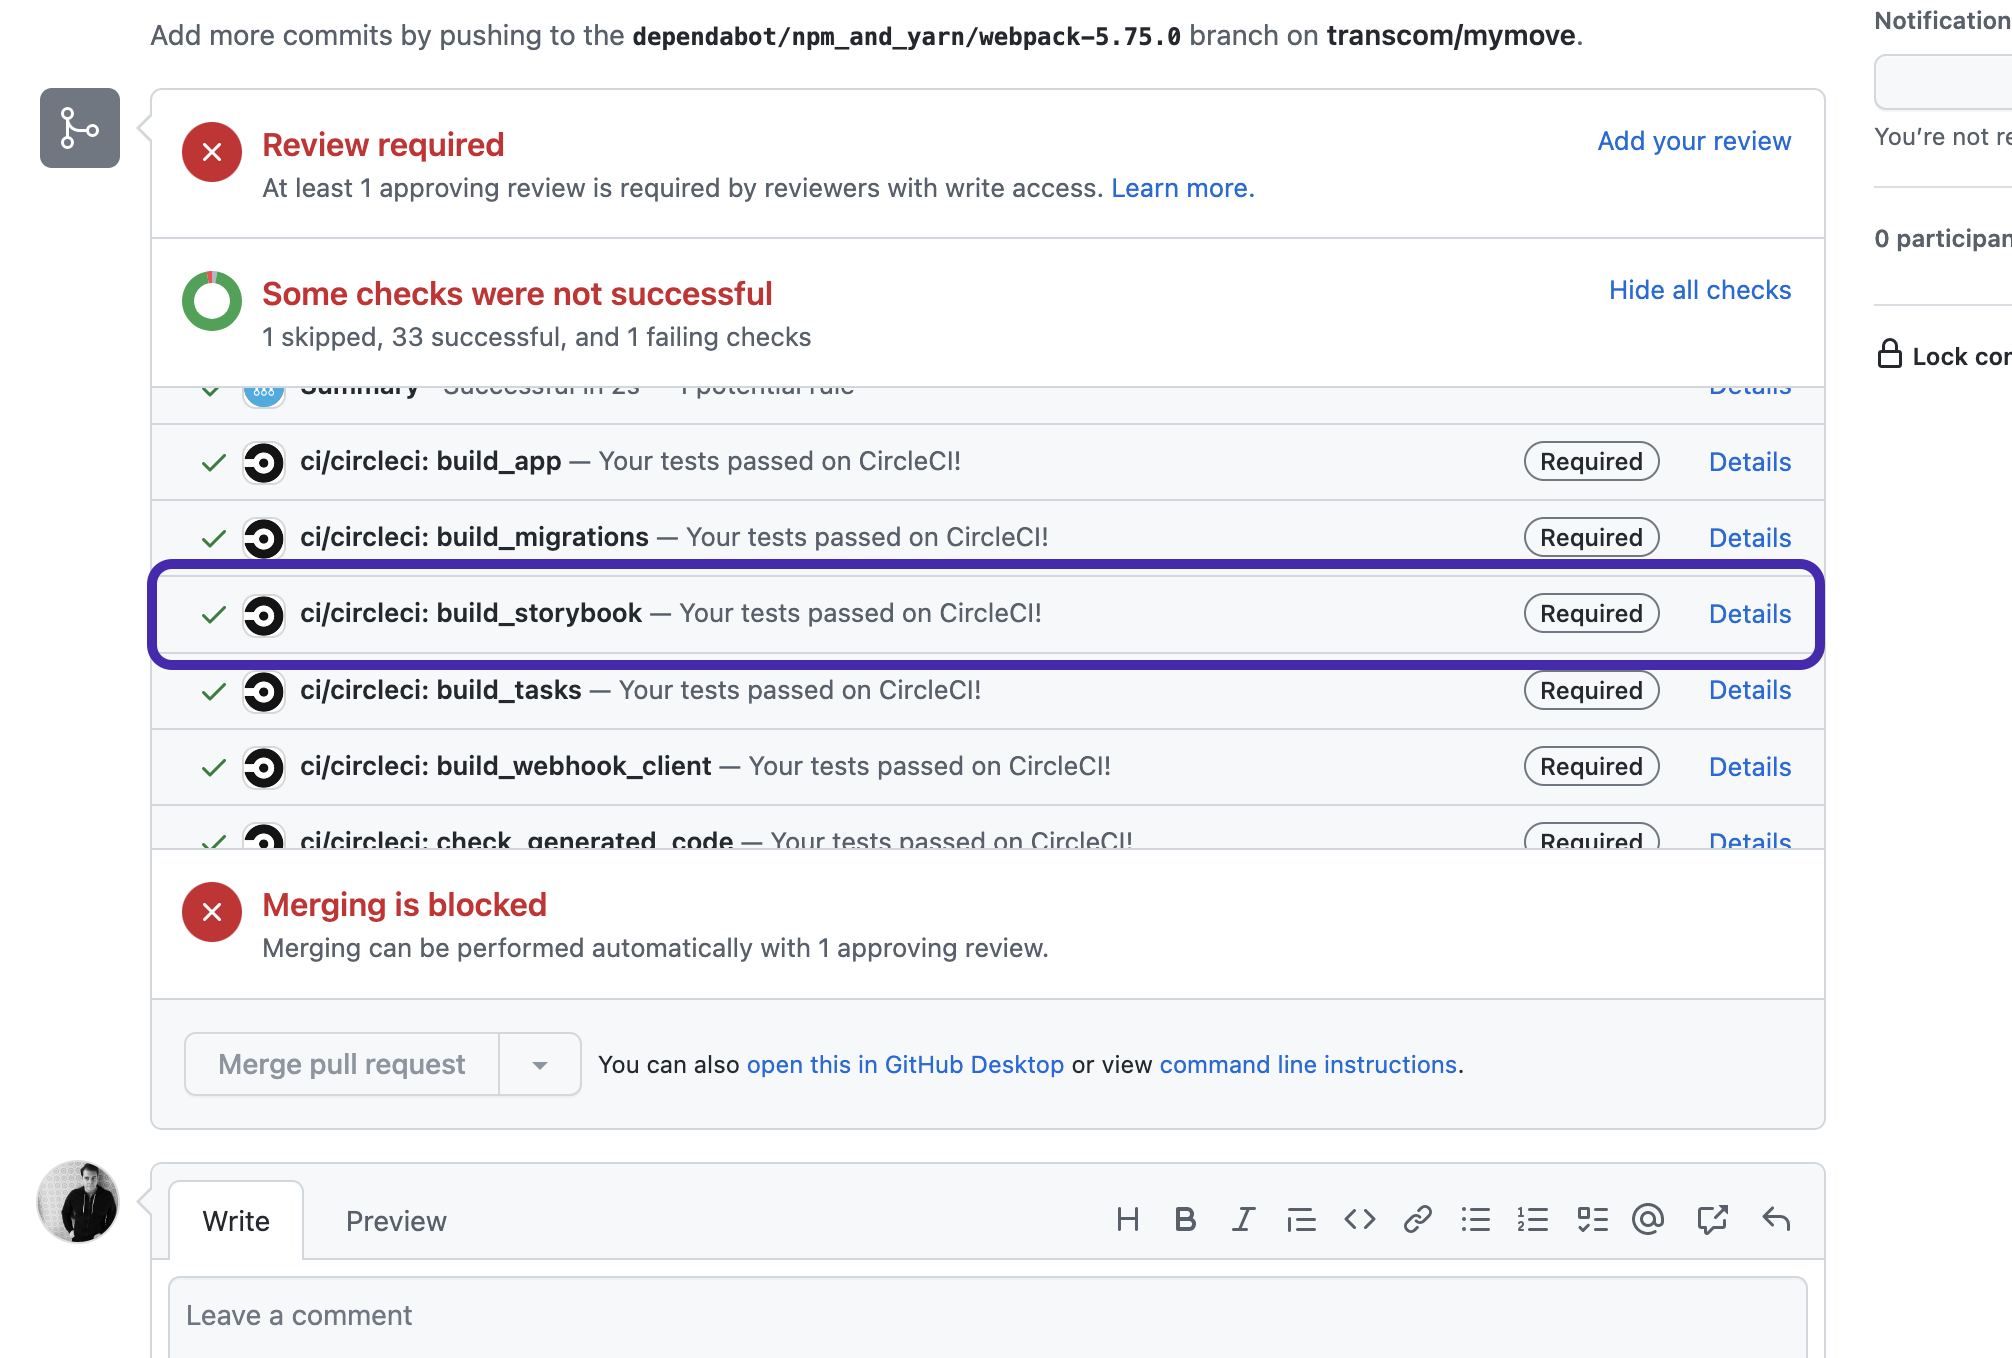
Step 1: When viewing a pull request on GitHub, scroll down to the section of the page that talks about automated checks. (This is also where you'll find the link to review and approve Happo diffs.) Scroll to the line with the title ci/circleci: build_storybook, and click on the "Details" link.
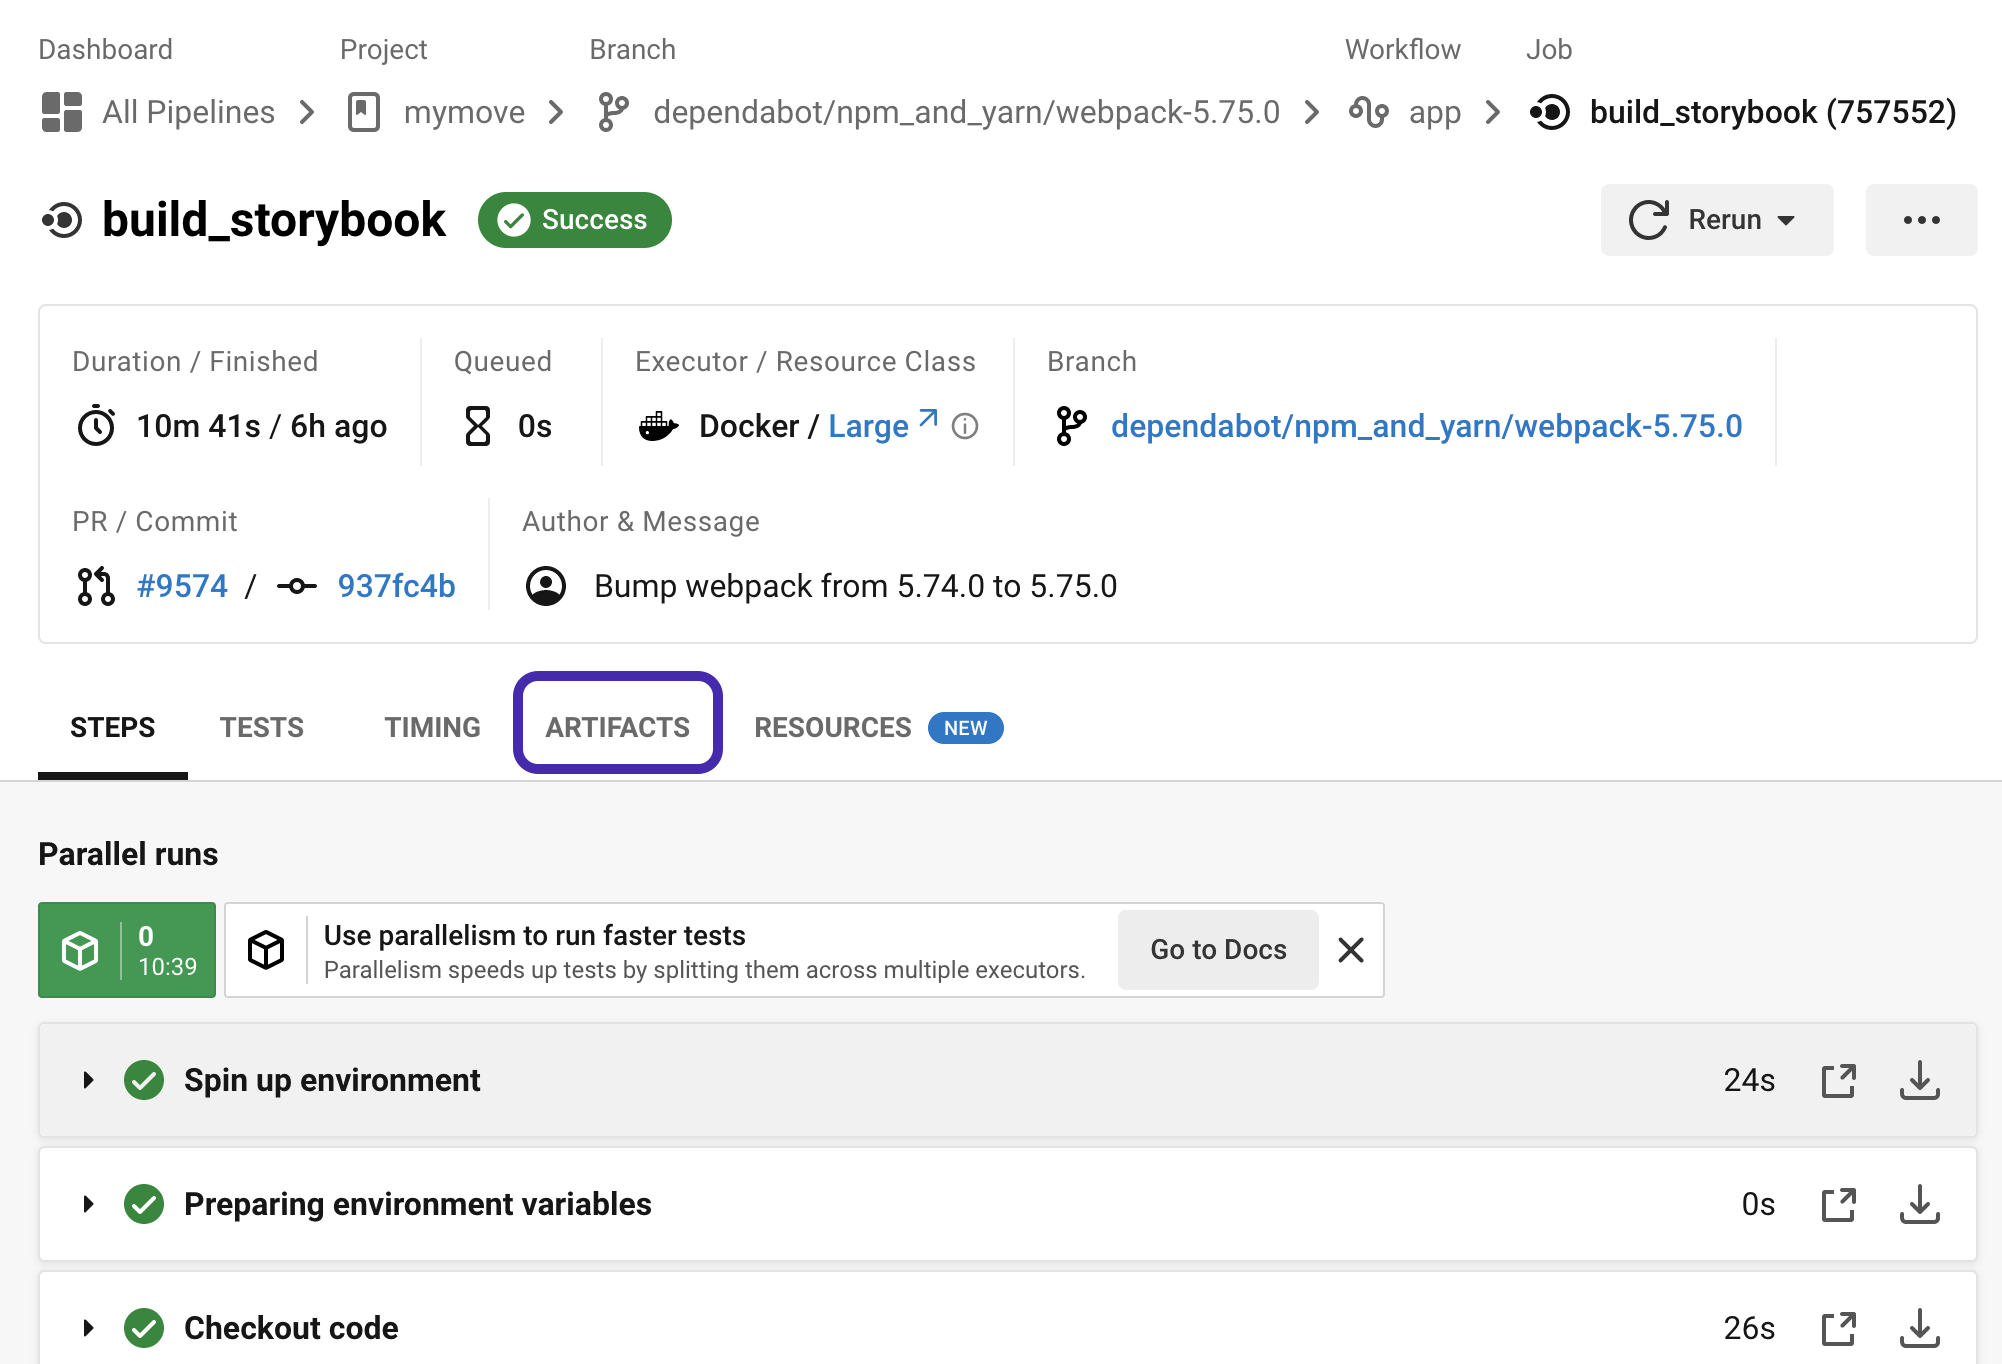
Step 2: On the CircleCI page, you'll see several tabs near the middle of the page. Click on "Artifacts." (In order to view this page, you may be prompted to log into CircleCI, since other tasks that are run may contain sensitive information. Use your GitHub account to log in.)
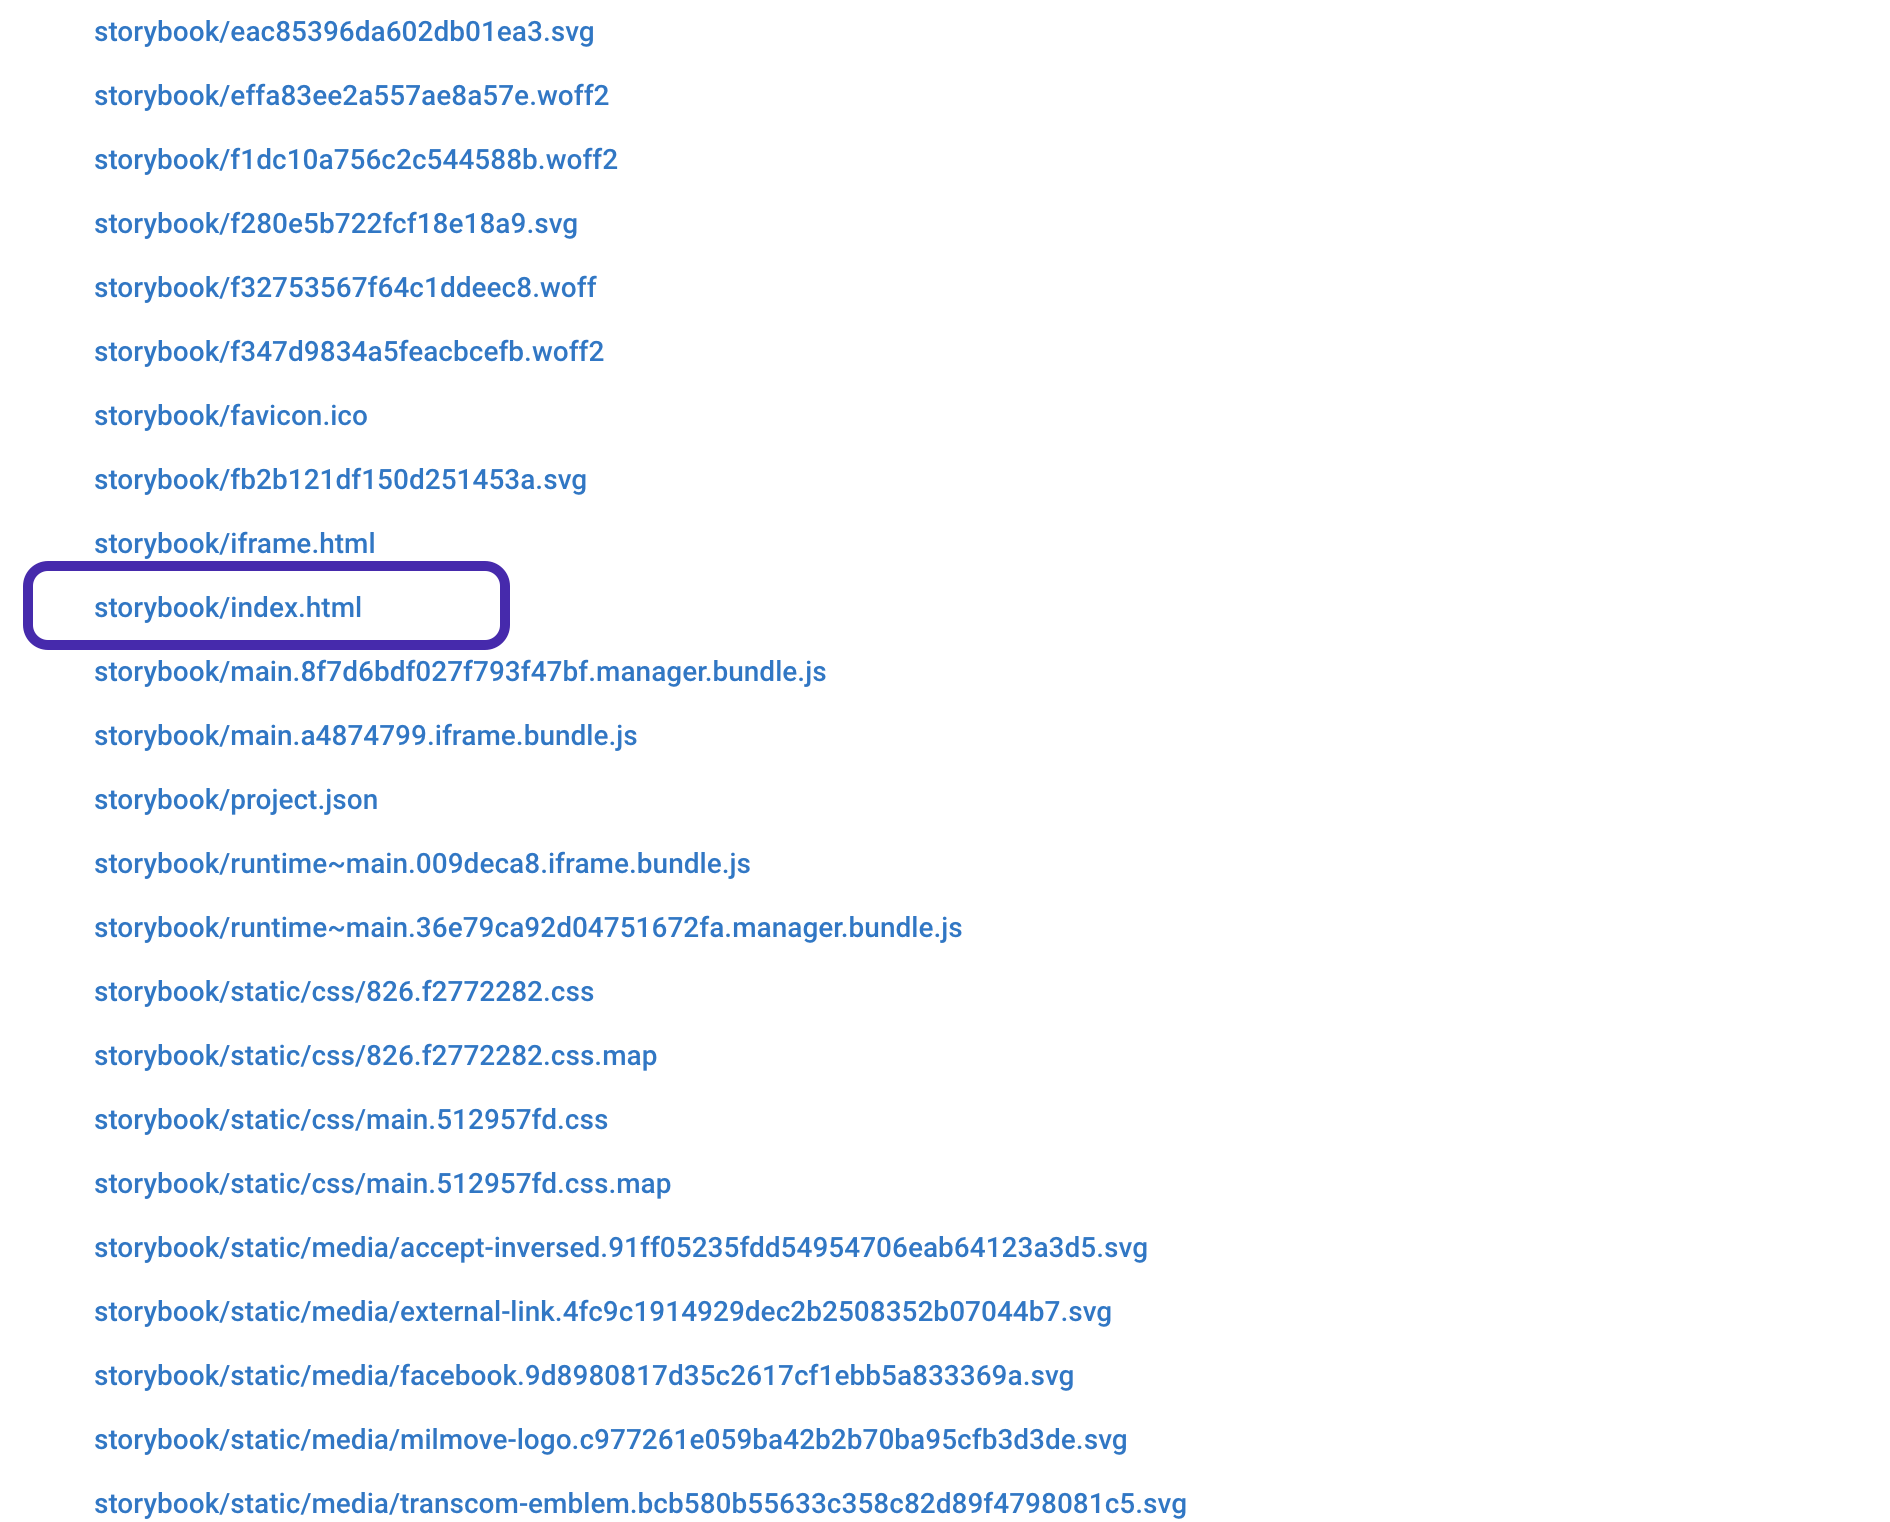
Step 3: Find the storybook/index.html link. (It'll be near the bottom of the page, as these links are in alphabetical order.) Clicking on that will take you to an externally-hosted copy of storybook; that copy will be up to date with the current state of this pull request's code.
Please note: that you will need to go through this process for every change within a pull request. CircleCI generates these externally-hosted copies of storybook automatically, but it does that with unpredictable links. Any time a pull request is updated with additional code changes, CircleCI will generate new links, with a new build of storybook, rather than updating any existing copies.
Adding Stories
To showcase a component add the stories to the src/stories folder in an appropriate file. The storybook documentation on Writing Stories is a good place to start with how to create ones. If there is not an appropriate file you need to create a new file in the pattern componentName.stories.js in the src/stories directory, and then modify the .storybook/config.js file to include your new file in the generated site.
Addons
Stories in Storybook can use addons to extend the features of Storybook. Some addons already included are the actions and knobs addons. The controls for each of these addons shows up in a pane at the bottom of the page where they are used. If you cannot find the pane try toggling the Change addons orientation from the ellipsis menu next to the logo in the upper left, or using the D keyboard short cut to toggle it.
Actions
Storybook Addon Actions can be used to display data received by event handlers in Storybook. See the documentation for more details.
Knobs
Storybook Addon Knobs allow you to edit props dynamically using the Storybook UI. You can also use Knobs as a dynamic variable inside stories in Storybook. See the documentation for more details.
Story changes require approval of Design
As part of the new process of Design and Engineering collaboration, the design team has been made code owners of the code in src/stories and the reference, i.e. approved, images in .loki/reference. So if you are adding a new story, modifying an existing one, or updating Loki reference images you will be required to have a designer give their approval on the GitHub PR.