How to Create & Submit a Pull Request (PR)
Initial steps
The setup: When beginning work on a BL item, it's important to know the process of how we handle pull requests, how to name things, and the code flow process. The process is as follows:
- Pick your BL item and confirm the acceptance criteria and clarification of the work
- Load up VSCode and
git pullthe most recentmainbranch - Create a new branch based off of
mainwith the naming convention ofMAIN+B-XXXXX+short-description-of-work - Do all of your work on your
MAINbranch, commit all changes and confirm all tests are passing when done - Once work is complete, switch over to the
integrationTestingand do agit pull - Create a new branch based off of
integrationTestingwith the naming convention ofINT+B-XXXXX+short-description-of-work - Merge your
MAINbranch into yourINTbranch withgit merge origin/MAIN-B-XXXXX-short-description-of-workor whatever - Resolve any merge conflicts, Then push your code up
Creating a PR into integrationTesting
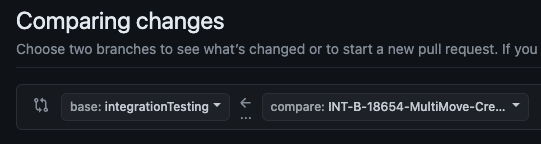
Step 1: Go to Milmove’s GitHub. On the homepage, you should see at the top your most recent push along with a green button that says ‘Compare & pull request’. Click on this green button.

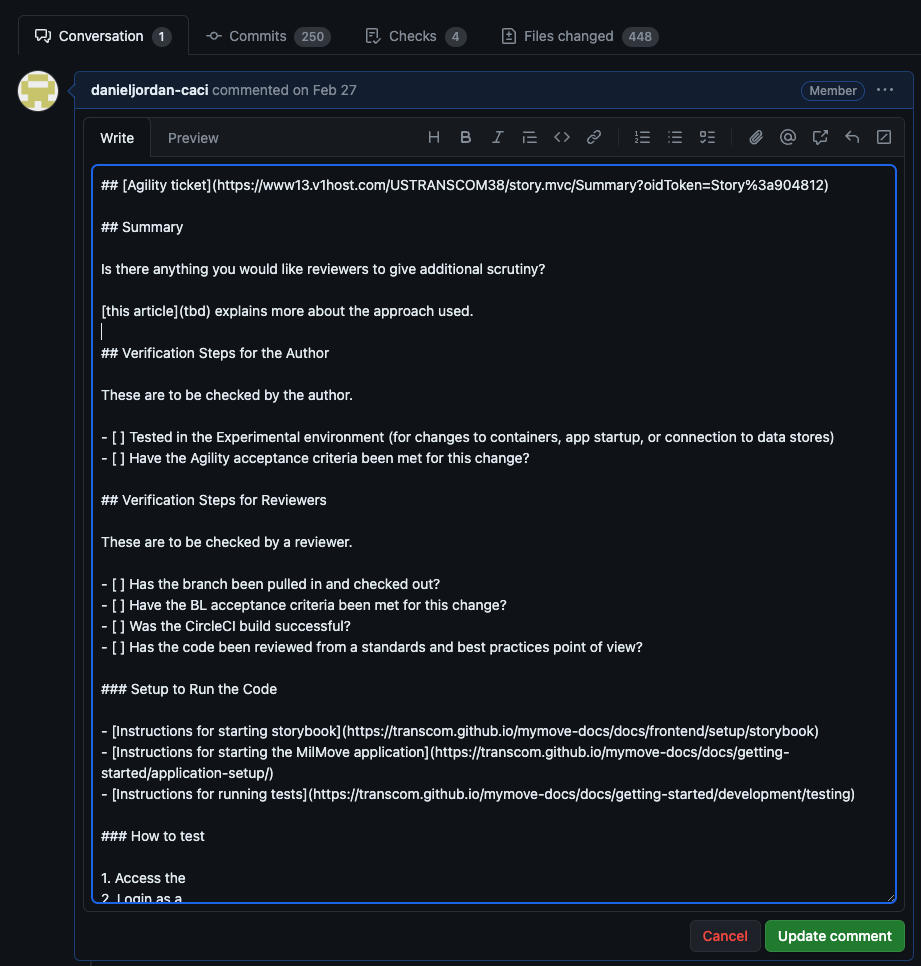
Step 2: Next, you will see a pre-made description that you can edit as you please - try to not include blurbs that you don't use. This description should have your Agility ticket number & a link to it, the steps reviewers need to take to replicate and see your change, and for good measure, add any relevant screenshots for more clarity. Feel free to check out your teammates’ PRs as well to help you get an idea of what to write.
Also ensure that your PR is being merged into integrationTesting by double checking the base branch.
Writing a PR description ✏️
Step 1: First things first, gotta give your PR a title. There is a required naming convention for the title: INT [Agility BL item number] brief description of task.
Ex: INT B-12345 Did Some Work
This lets folks know at a glance which environment the PR is going to, which BL item it is, and what it does.
a) Next, provide the link to your Agility BL item.
b) Under the “Summary” section, this is where you may add in any special details you believe reviewers should be aware of. For example, explaining why you wrote some code the way you did, why you chose this approach instead of another. Try and explain not only what you did, but WHY you did it.
c) “Setup to Run Your Code”-thankfully there is already boilerplate info there, so no need to touch this section.
d) Under “Additional Steps”, this is where you add the steps reviewers need to take to view and check your changes.
e) The “Verification Steps for Author” section is where you check to ensure your PR is ready for review. (See the Final Touches section below for more info on requesting reviewers).
f) “Verification Steps for Reviewers”- section for reviewers. Feel free to delete any sections here that are not pertinent to your PR. For ex: if your PR is frontend only, then you can delete the database section.
g) “Screenshots”-attach any relevant screenshots. Ex: for Frontend updates, a screenshot that displays the change you made in the app
Final Touches 👌
Step 1: On the right hand side, you’ll see some categories that you need to assign values to. Specifically, we will focus on the “Reviewers” and “Labels”.
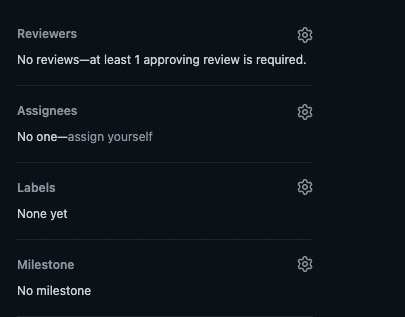
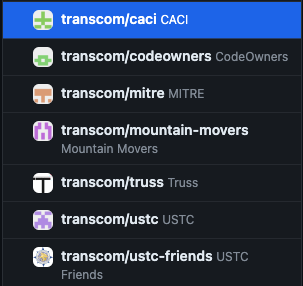
a) Under “Reviewers”, select your team from the dropdown. If you are making a change that may affect other teams, make sure to add them as reviewers as well. If you don't see your team name here, you can just manually add each member of your development team on here so they're notified that a PR is ready. In addition to your team, select 1-2 other developers NOT on your team as reviewers. This allows for collaboration and avoids compartmentalization of code reviews.
At least 1 engineer from your team needs to approve as well as a minimum of 2 approvals are needed on your PR in order for you to merge it in.
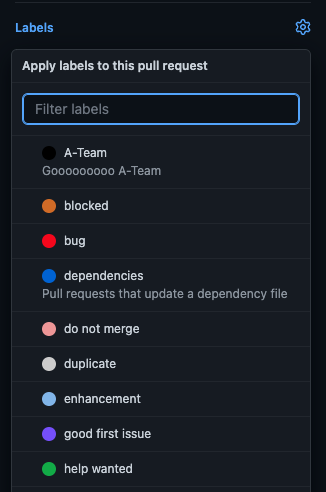
b) Under “Labels”, select your team name & also select INTEGRATION
c) Under "Assignees", select your name
Submitting a PR 🎉
Step 1: Proofread and do a once-over to ensure all the necessary details are mentioned in your PR. When you feel it is good to go, click that green “Create pull request” button!
You should now see your PR in the Pull requests page.
Step 2: Go back to your Agility board. Move your ticket from the "Implementation" column to the “Peer Review/Security Scan” column.
Merging your PR 💯
Step 1: Once you’ve received the necessary approvals for your PR and all the checks have passed, it is time to merge it into integrationTesting.
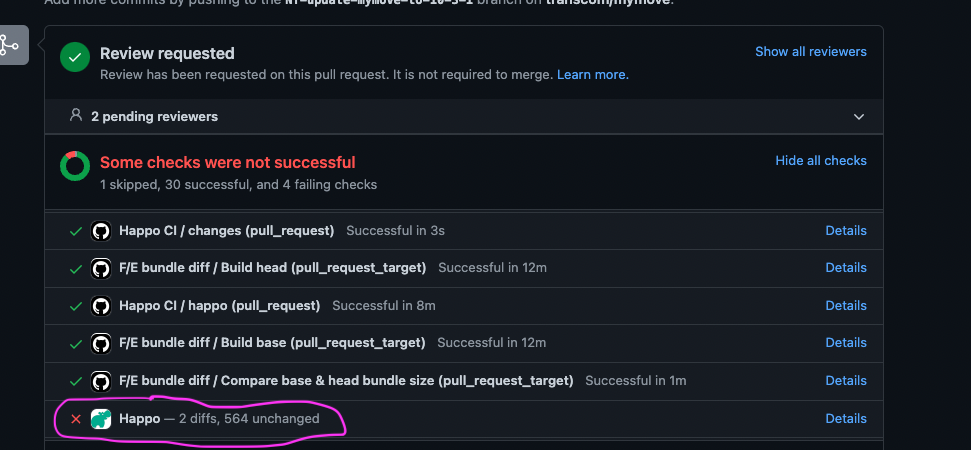
a) Scroll down in your PR page, towards the bottom you’ll see a list of checks that get run. If you’re making changes in the Frontend, you’ll usually get Happo diffs and a failing test for this as a result. Make sure a developer also approves your Happo diffs prior to merging your PR.
NOTE: If any of your CircleCI tests fail, click the “details” link to get more info.
- Depending on whether your ticket is frontend or backend, you should run
make_client testormake_server testlocally respectively, to make sure all tests are passing before you commit your changes & submit a PR.
-If client test or server test fails, that means either a) the code changes you made affected another thing and it caused the failing test or b) you need to make revisions and adapt the tests to account for the changes you’ve made.
a) Make sure to regularly pull from integrationTesting to keep your branch updated with the latest before merging. Otherwise, you may get a warning that states ‘branch has conflicts…’
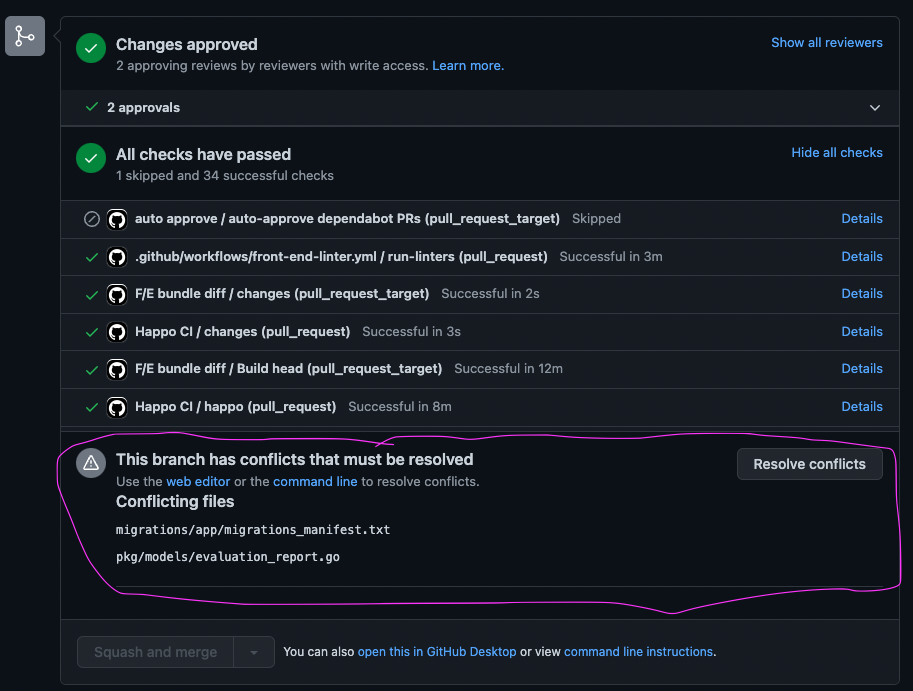
b) Once you see 3 green checks for - changes approved, - all checks passed, - branch has no conflicts, you’ll see the bottom green button "Merge pull request” is enabled. Go ahead and CLICK THIS BUTTON and your PR is merged!
CONGRATS! YOU HAVE SUCCESSFULLY MERGED YOUR PR INTO integrationTesting! 🎊
NOTE: After merging your PR, go back to the Agility board and move your ticket from the “Peer Review/Security Scan” column to the “Integration” column. This lets our testers know that the BL item is in the integration environment and is ready to be tested.
DOUBLE NOTE: If the testers find something in the integrationTesting environment that requires any code changes, you will need to make the fix in your MAIN branch and then merge that into your INT branch, then push those changes to your PR.
Testing is done. Now what? main! 🙋♀️
Step 1: So the testers have completed testing your BL item, moved it into the "PO Acceptance" column and had a demo showing your work to the PO. They accepted it, notated in the Agility ticket that they accepted it and the testers should move your BL item into the "Review/Merge Staging" column in Agility. This is your cue to create a PR into main.
Step 2: Since you've already done all of the work in your MAIN branch, all you have to do is create a PR and copy some stuff over. So let's do that. Create a PR that has your MAIN branch merging into main. Ensure your title mimics your INT branch title, but ensure you replace INT with MAIN
Ex: MAIN B-12345 Did Some Work
Step 3: Copy the url link of your INT PR and paste it in the top of your description. Should look something like this:
[INTEGRATION PR](https://linkToYourPR)
Then, back over in your INT PR, you'll copy over all of the description in that BL item and paste it in the MAIN branch description.
Step 4: Do the same as above, assigning reviewers, labels (MAIN this time), and yourself as an assignee
Step 5: Create the PR!
Step 6: Wait for the appropriate approvals & reviews. Hopefully there were no conflicts, code changes match exactly, and the commits match up from your INT PR. Also make sure you're updating your branch with main along the way.
Step 7: Once you get at least 2 approvals, you're ready to request your PR to be merged into main! We only let a select few have the power of merging code into main, so find the member on your team that is a CODEOWNER and have them merge your PR!
CONGRATS! YOU HAVE SUCCESSFULLY MERGED YOUR PR INTO main! 🎊
BUT WAIT! NOT DONE YET! ✋
Now we need to move some things in Agility and add one little thing before we can mark this BL item as complete.
Navigate to CircleCI and find your PR that is currently building, or has already built, into main. Ensure you are looking at only builds into main.

You should see a big list of builds, but find the one that matches your branch and you'll see a number to the right of mymove on the left side of your build. This is your build number. Copy this number and open up your BL item in Agility (should currently be in the "Review/Merge Staging" column).

You should see a more... button at the bottom of the screen (above "Show Relationships"). Click that.
Scroll down and you'll see a Build text input. Throw that build number in there.
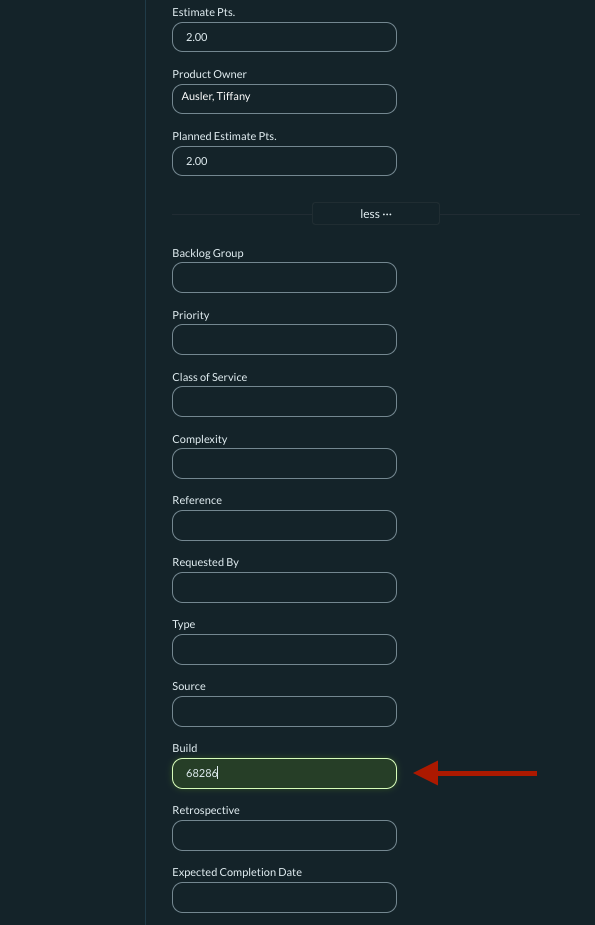
Once that has saved you can now close the window and move the BL item over into "Complete".