Intercepting Cookies for Postman
Please follow these initial setup instructions first!
For these APIs, we need to supply Postman with the appropriate session cookies from a logged-in user. One way to do this is the Interceptor Chrome extension from Postman. It creates a connection between Chrome and Postman that lets Chrome capture the cookies from a browser session and pass them on to your Postman app. We'll use Interceptor in Chrome to capture cookies as we log in to the app, and then switch to Postman to make the request.
This doc will take you through the following steps:
Install Postman and Interceptor
Open Postman and follow these instructions for installing Interceptor. Pasted below:
Navigate to the Postman app and click the satellite icon in the upper-right corner to Capture requests and cookies with Postman. You can then enable those two features in their respective tabs. Under Requests, change Source to Interceptor.
Select Install Interceptor Bridge to download the Bridge, an independent executable that facilitates communication with the Interceptor.
If you're on Windows or Linux, Postman will take care of everything for you. If you're on MacOS, you'll be prompted to install NodeJS if it's not already installed on your computer.
Confirm Interceptor is ready to use by checking that the Interceptor connected status is green. You can now capture requests from your browser and cookies from any domain to use in Postman.
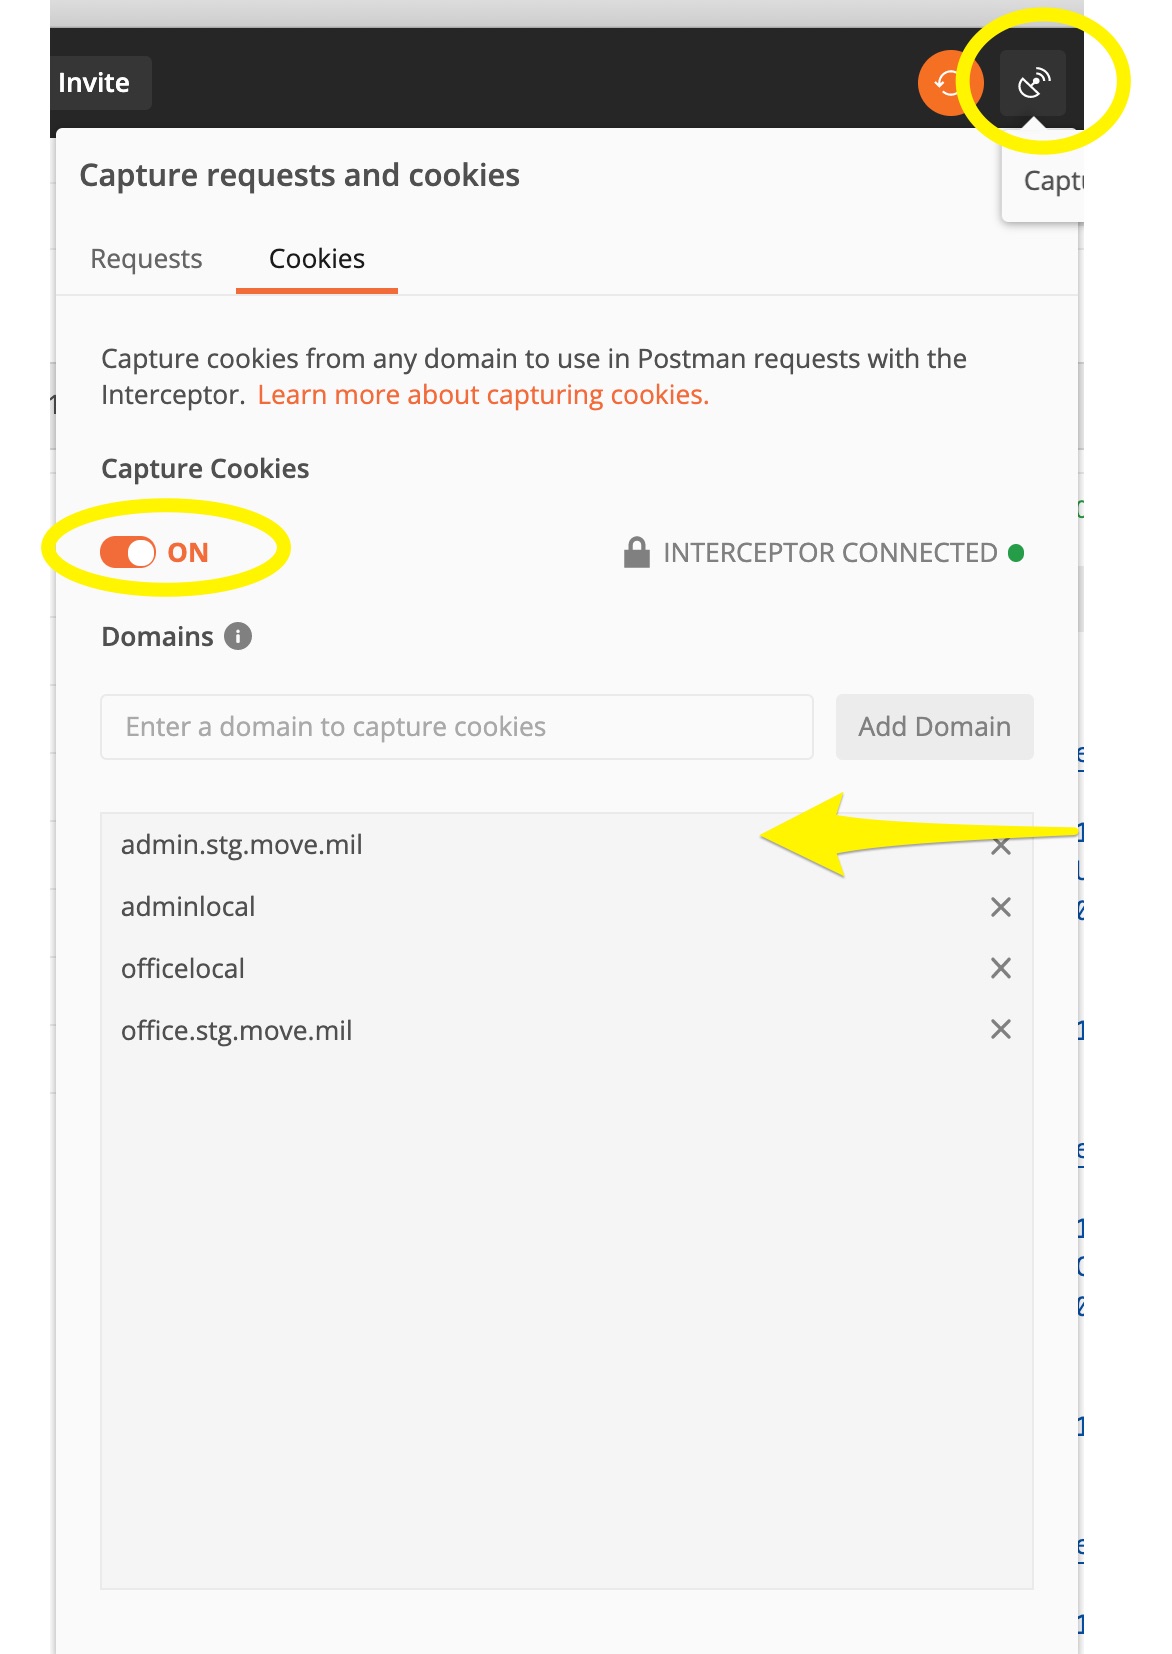
Turn on cookie syncing for Milmove domains.
Click again on the satellite icon and click on the Cookies tab.
Make sure Capture Cookies is toggled On.
Under Domains, add the following domains:
admin.stg.move.miladminlocaloffice.stg.move.milofficelocal
Find and transfer the necessary cookies
We’ll run through an example with the Admin API.
In your terminal,
make server_runandmake admin_client_runIn the Admin app, click Local Sign In and log in as an admin user.
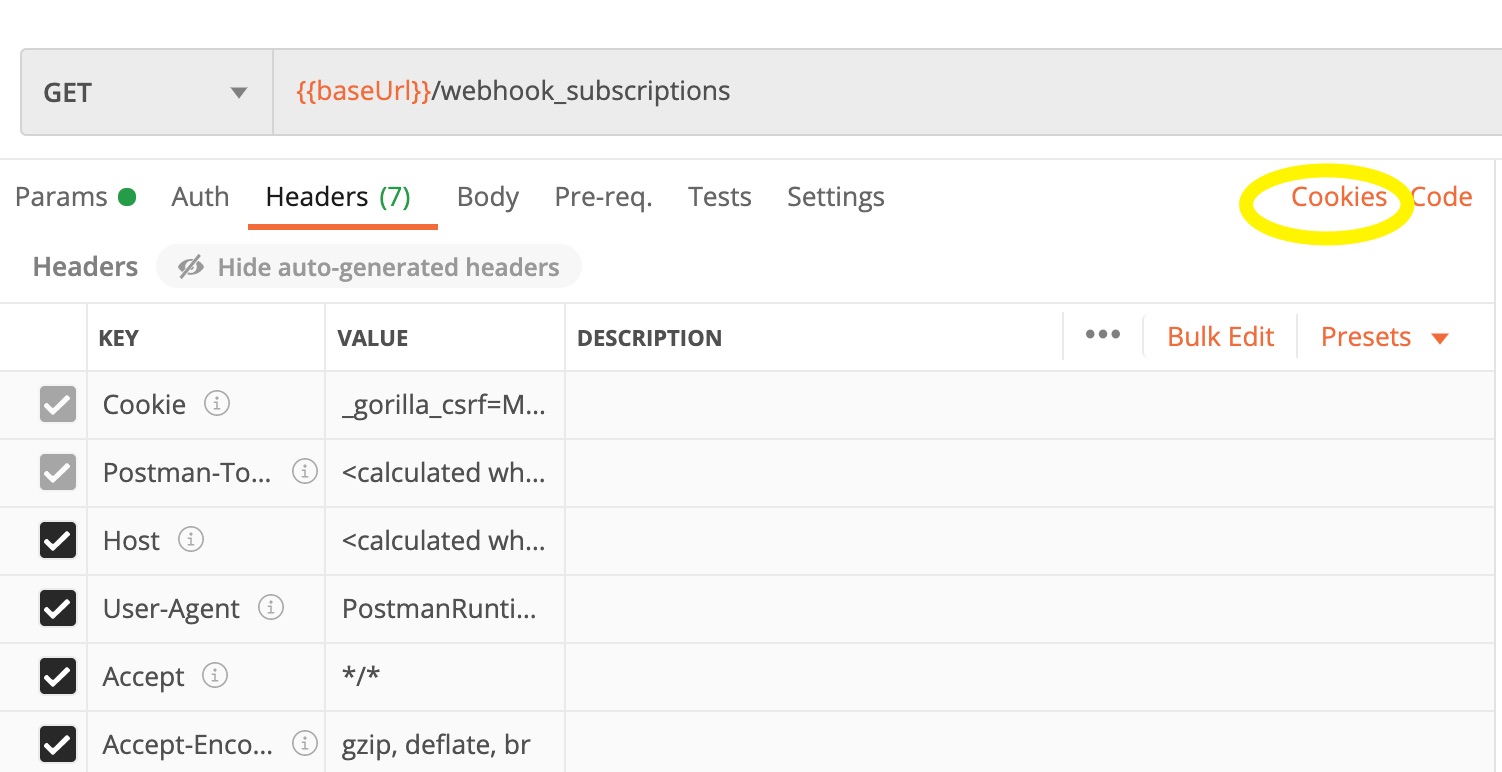
In Postman, make GET request to an Admin endpoint. e.g.
http://adminlocal:3000/webhook_subscriptionsSome people have luck with Interceptor successfully updating all cookies on the first try, and you may get a 200 here! But it’s common to get a
403 Unauthorizedat this point. To fix, we’ll update theadmin_session_tokenmanually in Postman.In Chrome, open up dev tools -> Application -> Cookies -> Copy the token for
admin_session_tokenIn Postman, click the
Cookieslink in your Request view. You should see three values populated. Click theadmin_session_tokencookie, paste in your new value, and save.
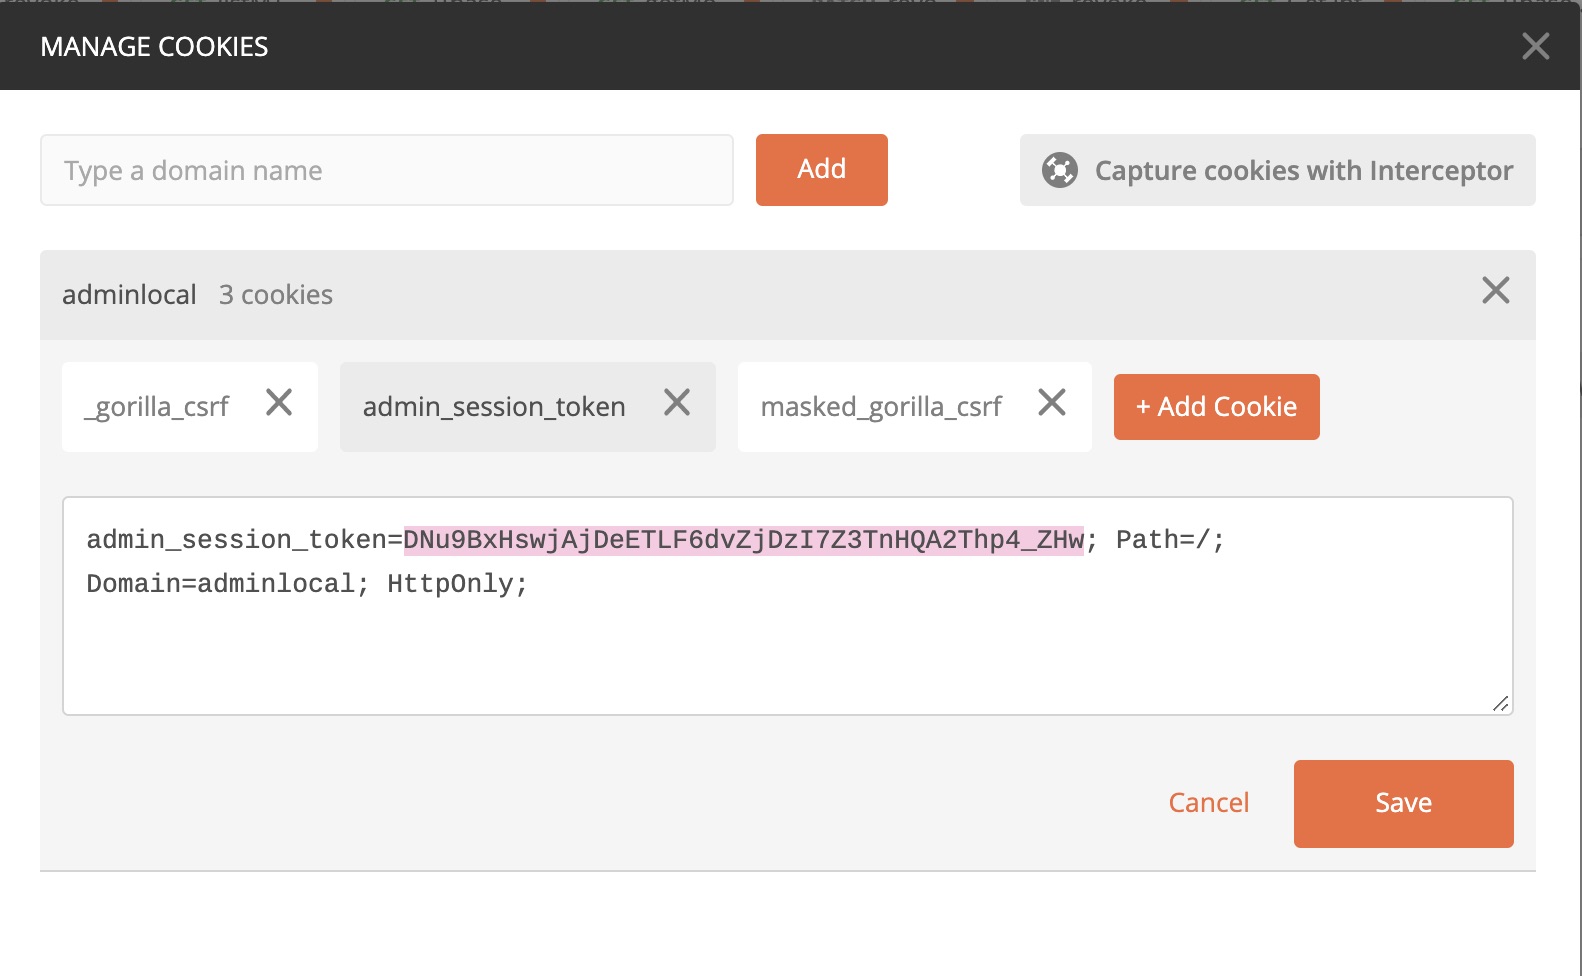
- Retry the
GETrequest. You should receive a 200!
Form a working GET and PATCH request in Postman
At this point, you’ve already made a successful GET request. Now that your session token is updated and Interceptor is working, you should be able to make any GET requests without further setup.
To do a POST, PUT, or PATCH request, you'll need to add a new header.
In Postman, click the
cookieslink in your Request view. You should see three values populated. Click themasked_gorilla_csrfcookie, and copy the value.In the Request view, click Headers. Add a header for your request with the key
X-CSRF-TOKENand value<masked_gorilla_csrf value you copied>
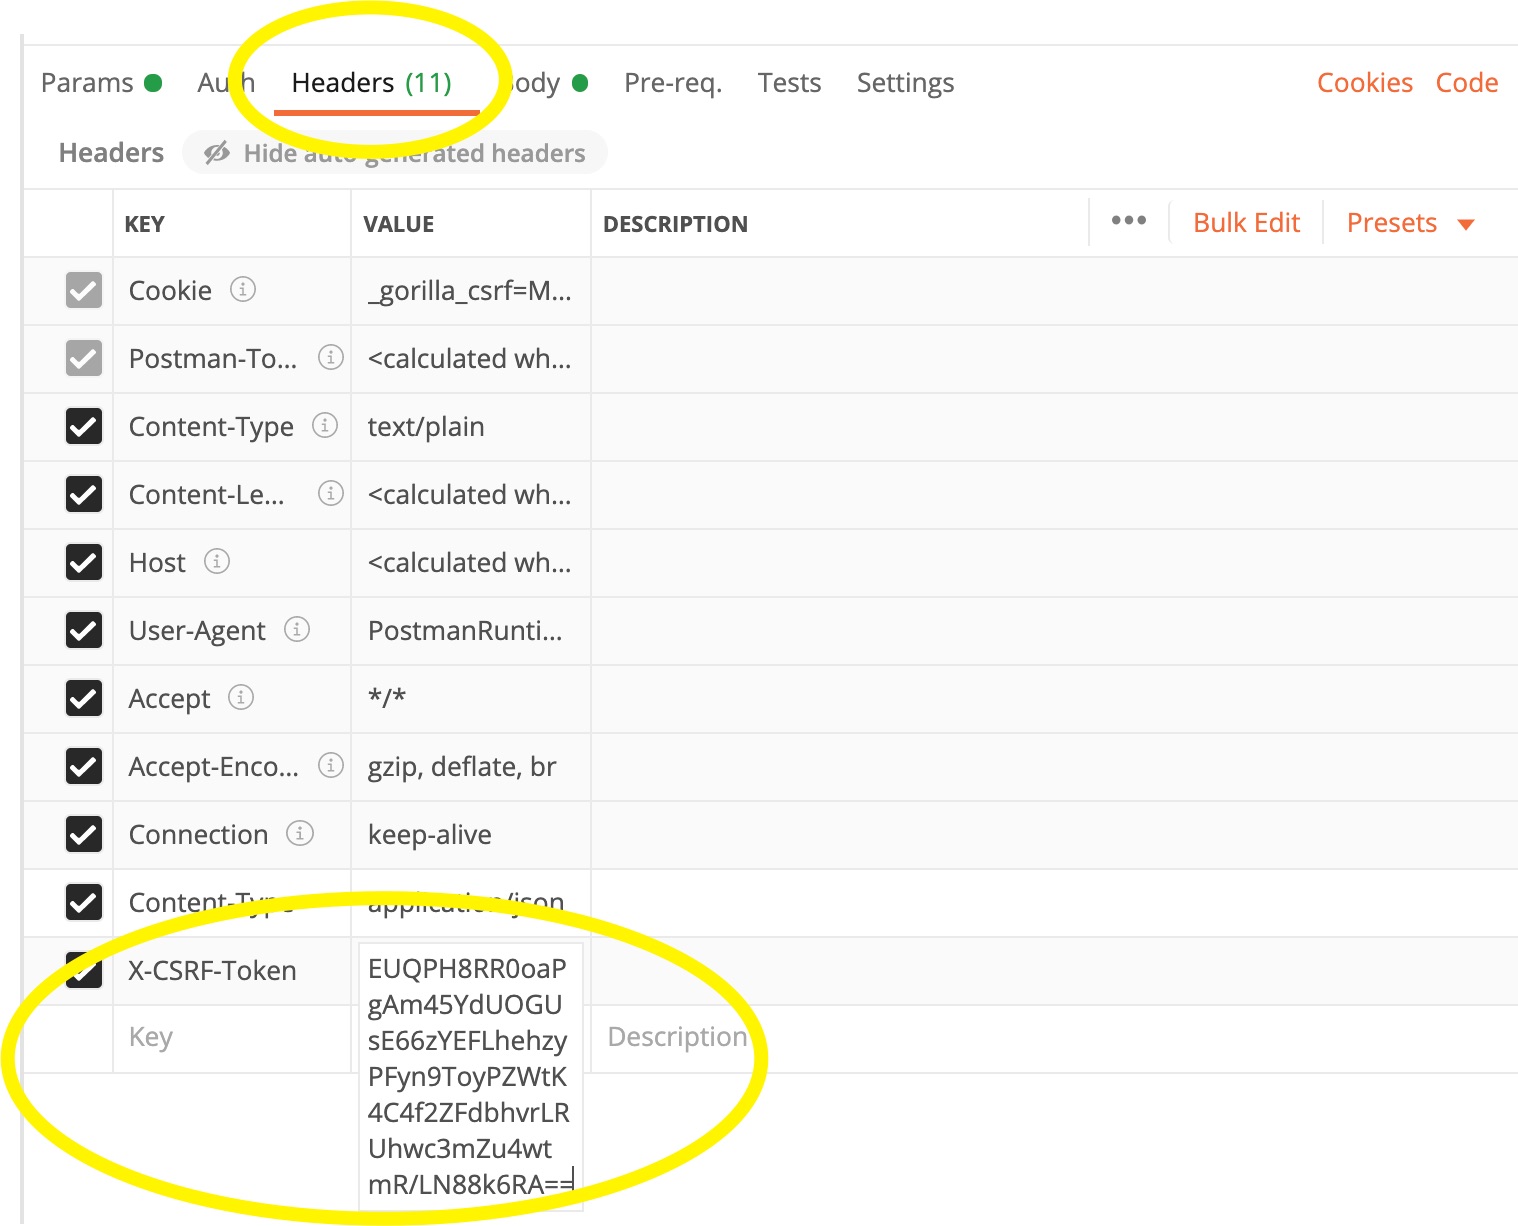
- Add your Request body for your update, and hit Send. Success!
Troubleshooting
Can't connect to Postman's request interceptor after install?
- It's possible that
~/.postman/InterceptorBridge/InterceptorBridgeis trying to look for a local install ofNode.- Try installing
Nodewithbrew install node - Then restart the Postman desktop app
- Try installing