Utilizing the GitHub Workflow for designing a Slice Demo Postman Collection:
Regenerate with "pre-commit run -a markdown-toc"
Slice Demo Prep Basics: Playing the Prime:
During the slice demo there will be various points of handoff from the TOO/TIO to the Prime and vice versa. When playing the prime, we recommend developing visuals that are split up into 3 sections:
Handoff from TOO -> Prime
Visual 1: Prime receives a notification of a move. Prime updates the move details. Prime performs another action (e.g. creates a service item)
Handoff from Prime --> TOO
After the Prime creates the Service Item(or Reweigh Request/SIT Extension/ or another action), there is a verbal handoff to the TOO. Nothing technical happens.
Handoff TOO --> Prime
The TOO reviews the Service Item and approves them and there is a verbal handoff to the Prime to show how a payment request is created and proof od service is uploaded
Visual 2: Prime creates a payment request
Visual 3: uploads proof of service.
NOTE: You may be able to combine visuals 2 and 3 by nesting the POST requests for creating a payment request and uploading proof of service, but this involves extensive research into grouping these requests.
Handoff from Prime to TOO/TIO
After the prime uploads the proof of service, they submit the payment request ID to the TIO and do a verbal handoff to the TOO.
Getting Started:
We have created a repo in GitHub with postman collections from previous slice demos. This means you can get a copy of all of them the way you would clone any other repo on GitHub:
- Clone the
prime_api_deliverablerepo:git clone git@github.com:transcom/prime_api_deliverable.git - Navigate to the
postmanfolder, where you will find previous slice demo collections (e.g. 202108-slice-demo) - Copy over contents from a previous collection or create a new collection from scratch.
If you have never set up postman before checkout our instructions for setting up postman.
Creating a Collection from scratch:
Once you have cloned the prime_api_deliverable repo, create a new branch if someone is reviewing your script or just start working directly in main.
Open the file in your favorite text editor. Under the postman folder, create a new folder for our slice demo collection.
Our naming convention for each slice demo folder is going to be: YYYYMM-slice-demo.
If your slice demo is happening in September 2021, for example, you will create a folder called 202109-slice-demo. In this folder create 3 more empty folders, and a file for payloads:
payloads.js- is a file that feeds therequestsfolderrequests- this folder contains node JS files that postman uses to build the collection.events- this folder contains node JS files that contain the objects that feed into the templates folder for the visualizations.templates- this folder contains HTML to add visualizations in the demo.
Setting up Index.js:
The index.js file is where you will store all of the elements that tell postman to create a collection for you.
Outside of these folders you will add a top level file called index.js, where you will add your path and fs requirements to use node.
const fs = require('fs'); // fs stands for file system
const path = require('path'); // internal library for node js that allows you to use path names
Following these two requirements must create your collection constant and a path for your collection:
const Collection = require('postman-collection').Collection; // make sure to npm install so that you can use this library
const fileName = path.basename(__dirname + '.postman_collection.json');
const savePath = path.join(process.cwd(), '/collections');
const filePath = `${savePath}/${fileName}`;
In the code above, the constant filePath knows to store your new collection in your current working directory's collection folder.
index.js does a lot for us. But the main purpose is to generate the JSON for postman to understand.
JS code is stringifies to JSON code, what postman uses, in this code:
fs.writeFileSync(
  filePath,
  JSON.stringify(sliceDemoCollection, null, 2)
);
Next build your collection. In this case we will build a collection with two requests:
var myCollection;
// Create a collection having two requests
myCollection = new Collection({
    info: {
        name: "2021 Sept Prime Demo",
        description: `
            ### Get Move endpoint
            We give this request a move code and it returns a move.
        `,
    },
    variable: {
        moveID: {
            id: "moveID",
            value: "",
            type: "string",
        },
        baseUrl: {
            id: "baseUrl",
            value: "https://api.stg.move.mil/prime/v1",
            type: "string",
        },
        getMoveTaskOrderTemplate: {
            id: "getMoveTaskOrderTemplate",
            value: "",
            type: "string",
        },
    },
});
myCollection.items.add([]);

fs.writeFileSync(
    filePath,
    JSON.stringify(myCollection, null, 2)
  );

  if (fs.existsSync(filePath)) {
    console.log(`💾 The Postman Collection has been saved at ${filePath}`);
  }
To check to make sure that your empty collection is created, run teh first step in Running your new collection
Utilizing the utils folder:
There is a utils folder that lives outside of your new collection in the postman folder.
This folder is important to take note of because it contains helpers that you will utilize in your collection.
The helpers contain utils such as Postman SDK functions, an event item that runs in postman's Test tab, and a post item object that has JS objects such as requestID, and node objects for working with file system and file paths.
These helpers include:
fileUtils.js- contains helper functions that can be used in your collection.
currentTime.js- contains a helper function that returns current time in the format
HH:MM:SS.
- contains a helper function that returns current time in the format
createItem.js- contains helpers to build postman item objects and events, and return new items (e.g. an item that contains a request with a request body, headers, url, and description). Takes teh pre-request script and test script as optional values
addDays.js- this utility adds a function for adding days to a current date, and returns a future date formatted
YYYY-MM-DD. Be mindful that this function has no type checking.
- this utility adds a function for adding days to a current date, and returns a future date formatted
Setting up the Payloads file:
Key request id: value is the request payload
The Payloads file feeds objects to the request folder. This is where we will create reusable objects that we pass to the requests. Examples of this include: updating a shipment with the actual pickup date, actual weight, and estimated weight, updating a reweigh weight, scheduling a pickup date, etc.
Each action will be added to const payload which takes in a key values pair of {object: payload_for_object). For example:
  "mto-shipments-sit-extensions": {
    requestReason: "NONAVAILABILITY_OF_CIVILIAN_HOUSING",
    contractorRemarks: "Customer is in the middle of closing on a house, expects it to be in 10 days.",
    requestedDays: 30,
  },
Where the object in teh example is MTOShipmentsSitExtensions and he valued is the payload that includes a requestReason, contractorRemarks, and requestedDays.
After creating your payload objects, remember to export the module:
module.exports = payloads;
If you've used postman before, you'll notice that request and response bodies are JSON files in postman, however our payloads are JavaScript files. JavaScript provides us with a few advantages. Firstly, it allows the developer to leave comments within the payload file. Second, we can import utils to use in our code. Lastly, we can also use template tags when we are using JS files.
In a different folder, our JS code gets assembles into a JSON collection string that is outputted to a file for postman to generate our collection.
Setting up the Requests folder:
In the request folder you will create a JS file for each request to the Prime API.
Your files will contain a lot of similar code, which can eventually be refactored to put that code in it's own file and create all the requests in another file, but this will be left to your discretion.
What's unique about each file is the item that is being created. For instance, the item associated with the createPaymentRequest endpoint looks like this:
module.exports = createItem({
  name: 'Create Payment Request',
  requestID: requestID,
  url: '{{baseUrl}}/payment-requests',
  method: 'POST',
  headers: {
    'Postman-Request-ID': requestID,
    'Content-Type': 'application/json',
  },
  description: requestDescription,
  payload: JSON.stringify(payload, null, 2).replace(/"{{/g, '{{').replace(/}}"/g, '}}'),
  prerequestScript: requestPreRequestScript,
  testScript: requestTestScript,
});
Setting up the Events folder:
In the events folder we will create a file called test.js. This file will set up variables for the visualizer in Postman and environment variables that will be used in your collection.
This file is also where we will create a test script that will toggle between different visualizations as we run through the demo.
If you've created demo scripts in postman in the past, you may have used the Test tab to add your HTML and JS that generated the visuals during the demo.
This test.js file is essentially our test script and it will populate that tab once your collection is imported.
There is also an option to add a prerequests.js file, which populates the Pre-Request Script tab in postman, to run any code before a request is completed. However adding this file is not required.
Both JS files in the event folder will run directly in postman, unlike hte other JS files in the collection.
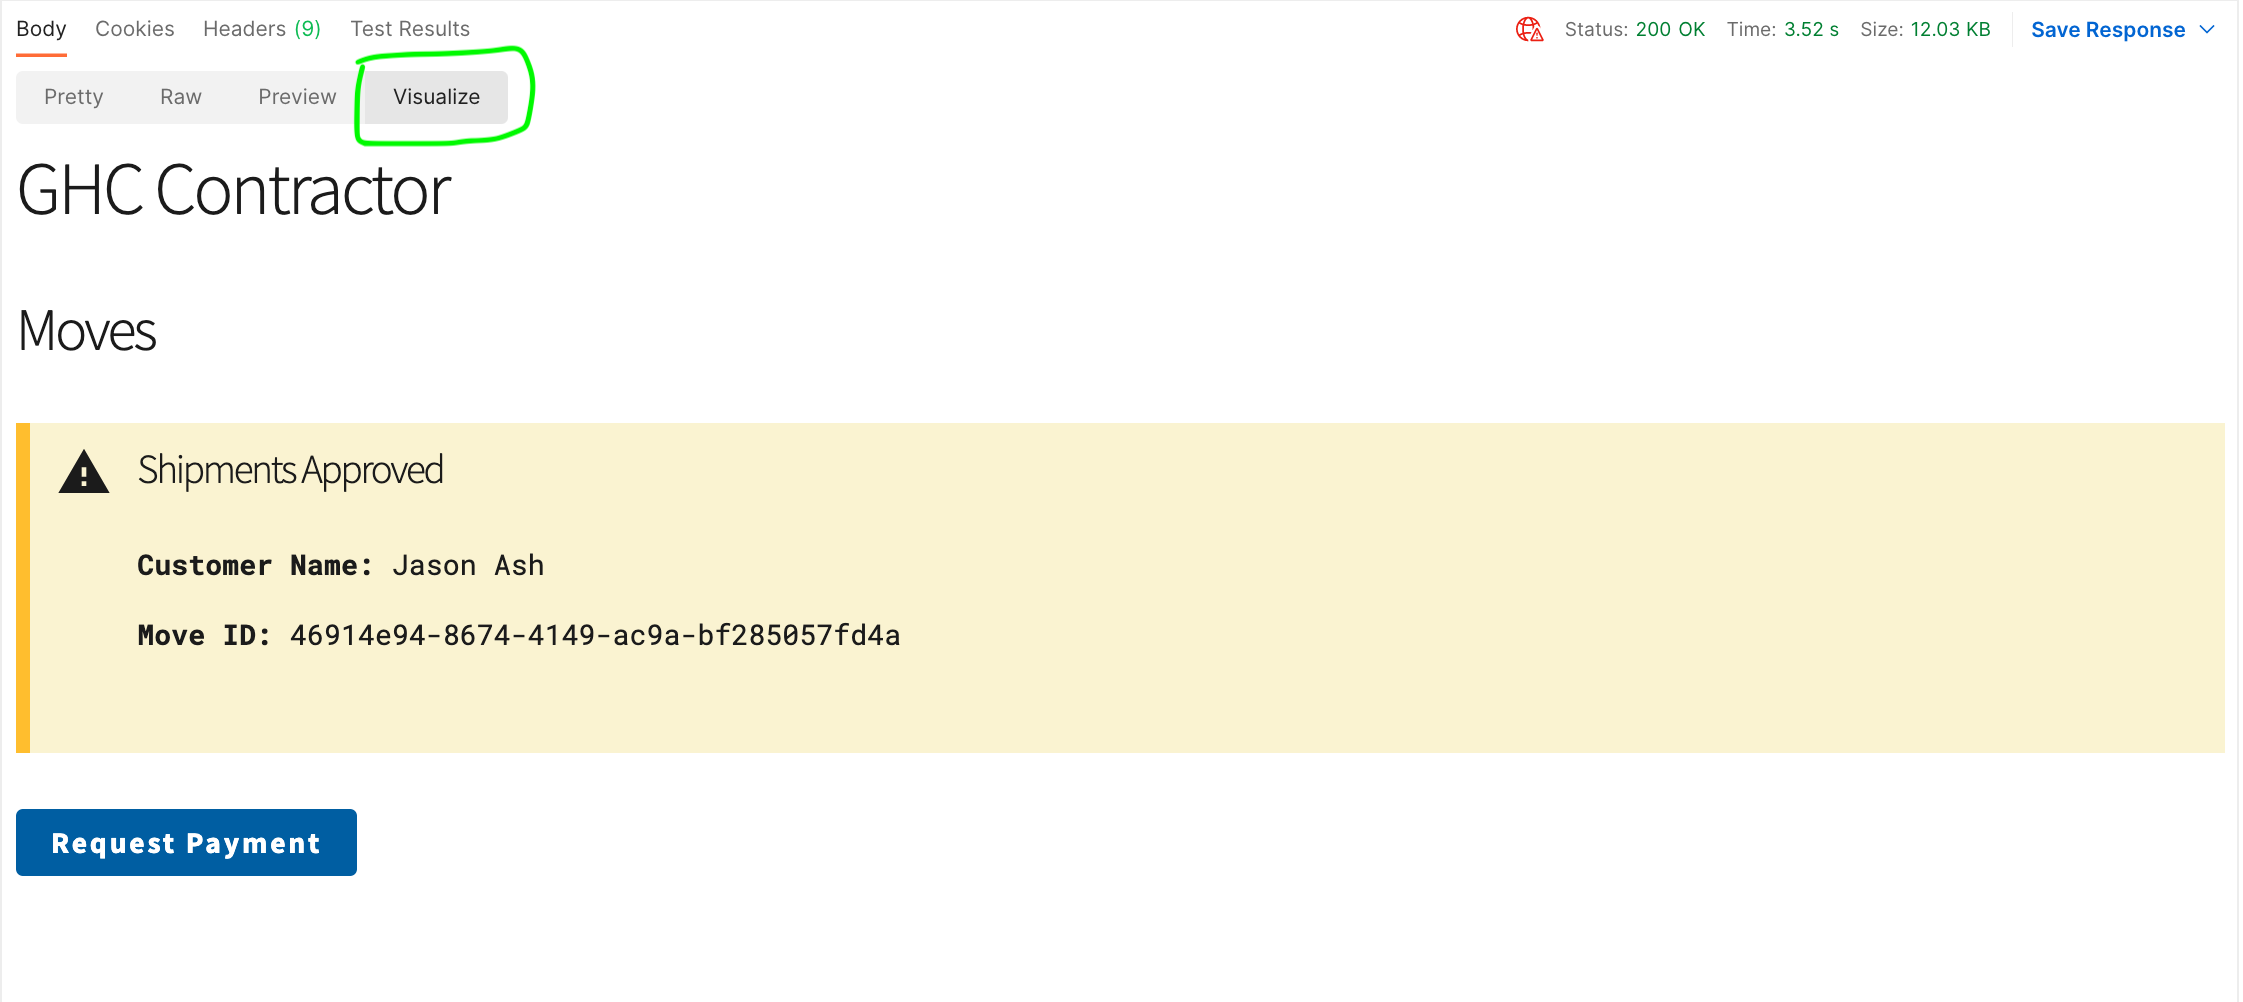
Setting up the Templates folder:
The templates folder is important because it contains teh HTML that we use to visualize the role of the prime in a file called visualize.html.
Running your new collection:
When you're finished with your collection, it is time to generate the postman collection.
- do an
npm install - run
npm run build_<collection-name>
If you ever need to update your collection run node <collection_name/index.js>.
Your collection will be imported into a top level folder called collections, from there import the collection into postman directly.
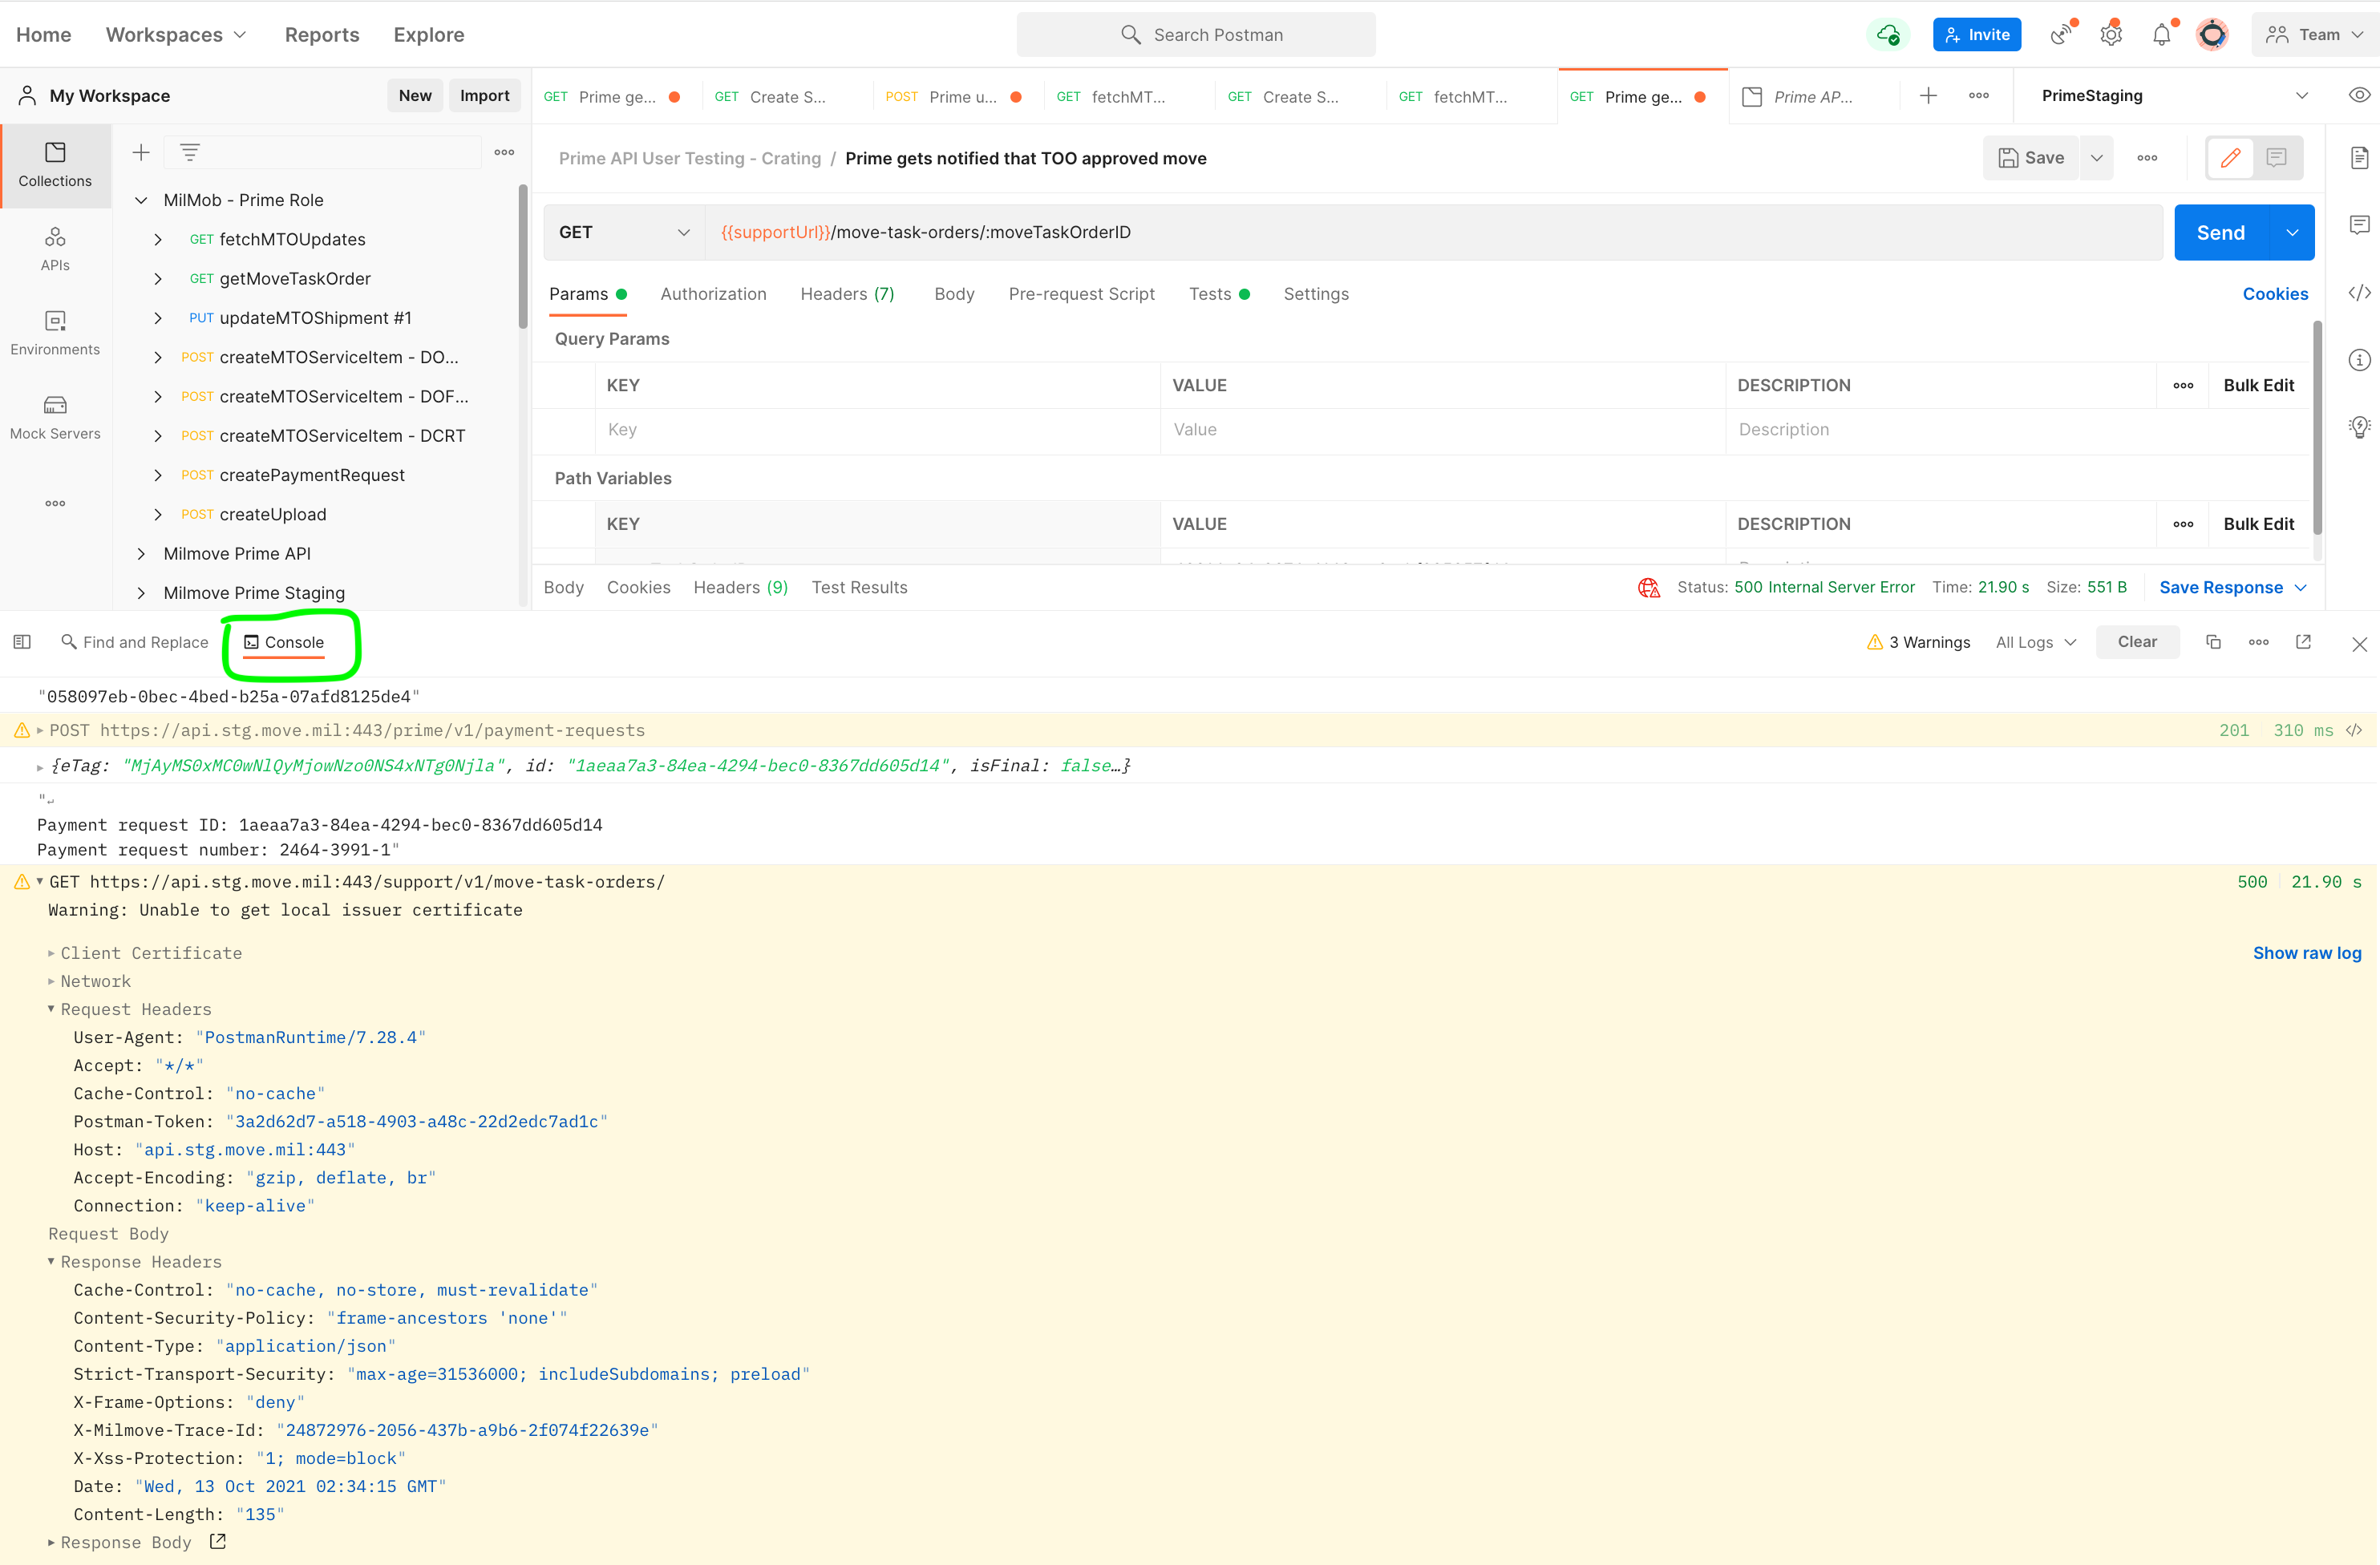
Checking for errors:
Debugging after hitting an endpoint has not been optimized yet. Unfortunately, you will still need to check the console in postman to see what errors pop up. Optimizing debugging is something we need to continue to work on as postman debugging tools are few and far between.