Setting up Postman
In addition to using the UI, you can use Postman to hit the Admin, Customer, and Office APIs. They require a slightly different setup process from other uses of Postman on the Milmove project (see: mTLS setup).
In order to set up Postman, you need to have Postman, local server, and local client running.
make server_run
make office_client_run
IMPORTANT: devlocal vs STG / EXP
The example on this page is written for devlocal. If you want to hit STG or EXP, you must use https:// in your base path. If you don't, you will get strange behavior, zero helpful error messages, and a headache.
Remember:
- Use
https://in your{{baseUrl}}on STG/EXP - Use
http://in your{{baseUrl}}on LOCAL
Office vs Admin vs Customer APIs
The steps in this doc apply to any API. The only differences are:
- Base path
http://milmovelocal:3000/internal/- Customer Localhttps://my.stg.move.mil/internal/- Customer STG (note the HTTPS)http://officelocal:3000/ghc/v1/- Office Localhttps://office.stg.move.mil/ghc/v1/- Office STG (note the HTTPS)http://adminlocal:3000/admin/v1/- Admin Localhttps://admin.stg.move.mil/admin/v1/- Admin STG (note the HTTPS)
- Cookies/Session Token
- For the Internal/Customer endpoints, make sure to log in to the Customer app and use the
mil_session_token.- For the GHC/Office endpoints, make sure to log in to the Office app and use the `office_session_token`. - For the Admin endpoints, make sure to log in to the Admin app and use the
admin_session_token.
- For the Internal/Customer endpoints, make sure to log in to the Customer app and use the
- Collection Files
internal.yaml- customerghc.yaml- officeprime.yaml- primeadmin.yaml- adminsupport.yaml- non-production API that is designed to help the Prime with testing
Importing a Collection
The steps below are walking through adding the GHC collection, but can be applied to any collection that you wish to add.
Adding the GHC collection
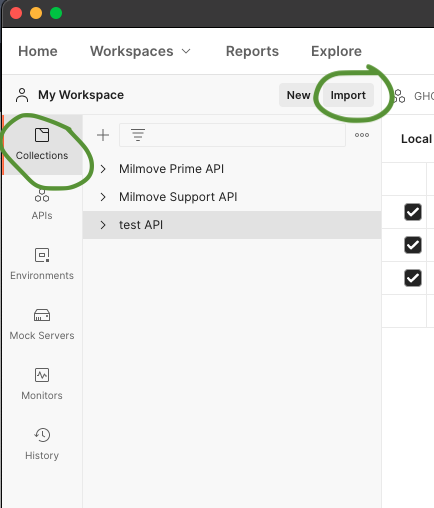
Click on the "Collections" tab in the left sidebar.
Click the "Import" button next to "My Workspaces" and then click the "Upload Files" button on the modal.
Navigate to the MilMove project folder on your machine, then locate the "Swagger" folder.
Select the
ghc.yamlfile and click "Open".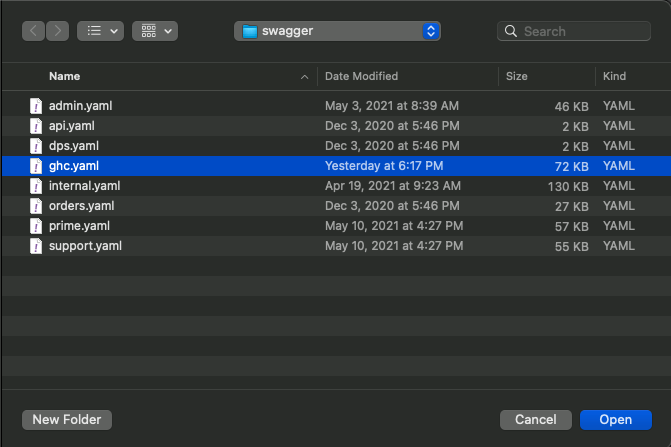
Confirm your selection on the modal (default values are fine) and click "Import".
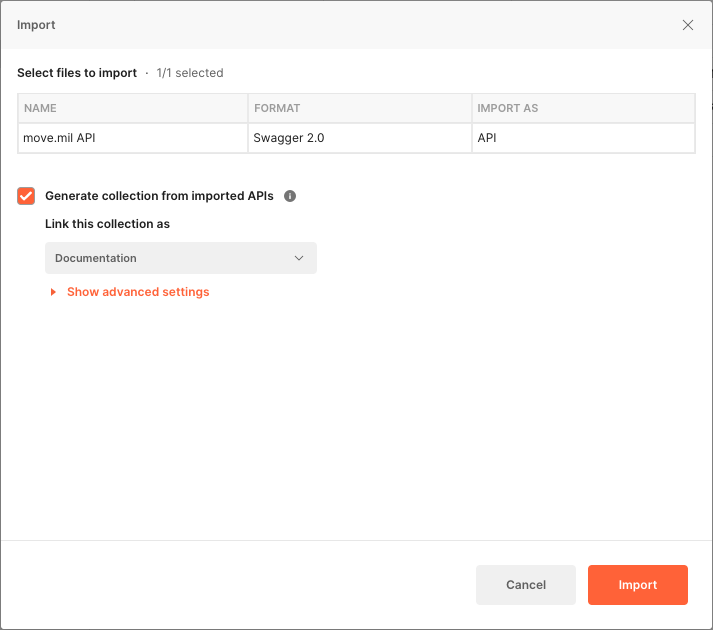
You should now see the "GHC API" listed in your collections.
Retrieving the Cookies
Now here comes the fun part, choose your own adventure! For these APIs, we need to supply Postman with the appropriate session cookies from a logged-in user. You can either create your own environment to hold the cookies, or use a cookie interceptor.
Creating an Environment
You'll want to make your own environment if:
- You're having trouble using the cookie interceptor
- You want a relatively quick setup
- You want to configure additional variables to use in your API calls
Using a Cookie Interceptor
You'll want to use the cookie interceptor if:
- You're having trouble creating the environment
- You don't want to have to create a new environment file for each API and have to swap between them
- You want cookies to be grabbed automatically for you
Specialized Postman Setup
If you are planning to use Postman for testing the prime and support APIs, you will need to make the following changes to support Mutual TLS.